How To Make Homemade Sourdough Bread
If you’re wondering how to make your own homemade sourdough bread from scratch, you’ve come to the right place. Baking bread at home is so much easier and tastier using a sourdough starter rather than traditional active yeast.
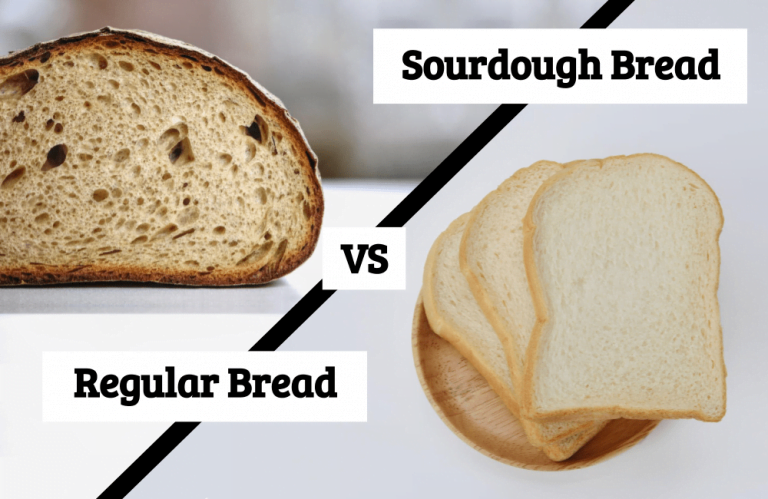
Homemade bread with yeast always comes out dense and yeasty tasting – I don’t know how commercial bakers get their bread to taste so good!
No matter, to get the best results in home baked bread, look no further than sourdough! To make your own sourdough bread at home you’ll first need a sourdough starter. You can buy sourdough starters locally (sometimes you can even get them on Amazon) or, if you really want to truly make your homemade sourdough bread from scratch, you can make your own sourdough starter.
Don’t be scared to make your own, it’s easy and kind of fun but it does take some time so you will need patience! You’ll need to allow about a week to get your sourdough starter or mother culture active and ready to bake with.
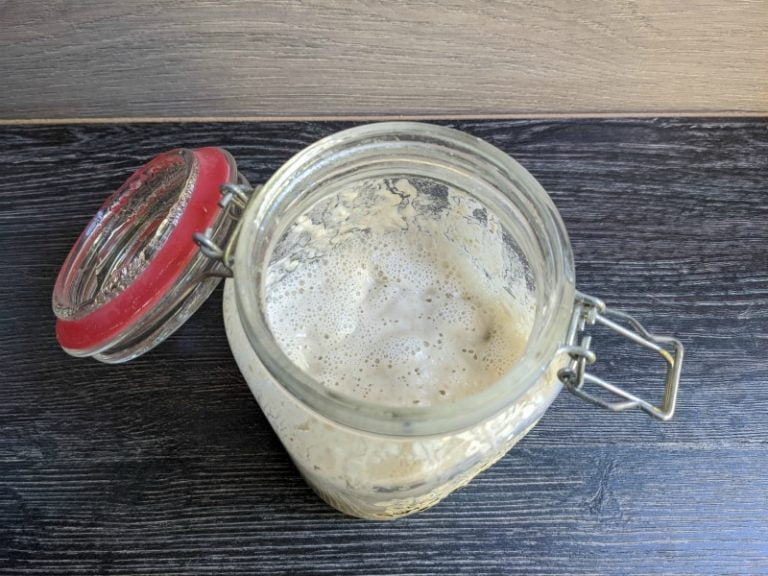
This post is all about how to bake sourdough bread with your sourdough starter that you have already nurtured and cared for and got ready for action. If you’re not sure if your starter is ready to cook with you can try the float test.
Basically add a teaspoon of your starter dough to a glass of water. If it floats you’re ready to bake, if it sinks, don’t despair, just feed your starter, keep it in a warm place and check it again tomorrow. Anyway, assuming you’ve got your own, live, active sourdough starter ready to go – how do you bake it into bread?
Let’s find out! Follow along our step by step guide and you’ll see how easy it is to make your own sourdough bread at home.
How To Make Sourdough Bread Using A Starter
First of all you need your culture to be active and bubbly ready for baking. Everyone has different ways of doing this, some like to remove half and feed it but I like to just give my jar of culture a feed and then keep an eye on it for the next hour or so then, when it has roughly doubled in size, I take out roughly half and use it.
So, here’s my way – feed your starter as you normally would. Put it in a warm place. Check on it every hour. In this instance after 2 hours my starter was looking good and ready to use.

Now for everybody’s big question – how much sourdough starter to use?I like to use 150g of sourdough starter for this sourdough loaf, which works out at approximately half of the sourdough culture. To do this put a large mixing bowl onto your kitchen scales and weigh the mixture as you scoop it from your mother dough culture.

At this point don’t forget to look after your leftover mother dough/starter culture – give it a quick feed and put it somewhere warm.

Next we need to add 250g of warm water (yes, I do weigh the water) and 25g of olive oil to the starter.


Give the mixture a quick stir through with a fork.

Next add 5g of salt and 500g of bread flour. (I have a confession to make here – in this instance I didn’t have enough bread flour (thanks Covid-19!) so I had to make up the balance with plain flour – hopefully I’ll still get a nice enough loaf to show you!).

Mix together with a fork.

Then get your hands in there and work it together until you’ve formed a dough of sorts.

Now we have our first “rest” period. Baking sourdough from scratch is quite a lengthy process but a lot of that time is just spent waiting! We’ll leave it now for about 30 minutes for its first “rest”.
Once your 30 minute rest time is up (it doesn’t matter if you leave it for longer just make sure you give it at least 30 minutes), use your hands to work and knead the ball for about 15 seconds or so and work it into a nice ball.

Cover the bowl with plastic wrap.

And then add an extra layer with a kitchen towel.

Then, find a nice warm, sunny spot to rest your dough.

And that’s it again for quite a while now. Leave the dough in its warm position until it no longer looks so dense and it has increased in volume – hopefully double its original size but at least 1.5 times its original size. This could take 3-12 hours!
I usually check on it at the 3 hour point – if it’s ready – amazing! If it’s not (usually) I like to give it a “stretch & fold”. This helps strengthen the dough. Simply pull a portion of the dough upwards and fold it over itself. Turn the bowl one quarter turn and repeat. Continue 4 times so each quarter potion of the dough has been stretched and folded.
You can repeat this process hourly during this resting/rising phase. I like to do my first stretch & fold at the 3 hour point and then check it hourly and repeat if the dough has not achieved its desired volume yet.
So, at the 3 hour mark you can see the dough is certainly rising but has not achieved doubling in size yet.

Time for a stretch and fold.


Then we need to cover it in plastic wrap again.

And put a tea towel over the top and place it back in a warm place.

We have lost the sun now and it’s getting cooler so we popped our dough on top of a warm hot water bottle to keep it happy and warm!

Keep it warm and check again in another hour.
An hour later and our dough is looking good but still hasn’t grown as much as I would like.

So, we gave it another “stretch & fold” and covered it up the same way to keep it warm again.


Another hour later and our sourdough is looking good – it’s reached somewhere between 1.5 times and 2 times its original size.
It hasn’t quite doubled yet but, truth be known, I’m running out of time to get this loaf cooked and it’s at least 1 and a half times bigger than it was so we’re going to move forward onto the next stage.

Tip the dough out onto a lightly floured surface, I like to use a pastry mat like this one.You don’t need to really knead this sourdough bread, instead perform a similar move to the stretch and fold – pull the dough up and fold over turning the dough a quarter circle each time.
You’ll finish up with a messy looking ball of dough like this where you’ve got folded edges meeting in the middle.

Next, prepare the pan you are going to bake your sourdough in. A dutch oven is the most popular way to bake sourdough bread. If you don’t have a dutch oven you can use an oven safe, heavy duty saucepan like I do. Both the saucepan and the lid must be oven safe, and it must be able to fit inside your oven – you might have to adjust your oven racks.
It’s a good idea to line your dutch oven or pan with either some baking paper or some flour. I like to use baking paper to make sure there can be no sticking.

Next you’ll flip your dough ball over so the nicer looking side is at the top and place it inside your dutch oven.

Place the lid onto your dutch oven and then it’s time to wait again! Keep it somewhere warm for another 1-2 hours to give the dough a second rise.

Nearing the end of this 2 hour wait period preheat your oven to 450℉ or 230℃ – you want your oven nice and hot when the bread first goes in.
After 2 hours our bread looks puffy and ready to bake!

Before your dough goes in the oven, slash it down the centre with a dough scraper or knife.

Then pop the lid on your dutch oven (or saucepan) and put it into your preheated oven. Immediately reduce the temperature to 400℉ or 200℃ and bake for 20 minutes.

After 20 minutes remove the lid.

Continue baking for another 30 minutes then open the door of your oven and continue baking for another 10 minutes leaving the oven door partially open.

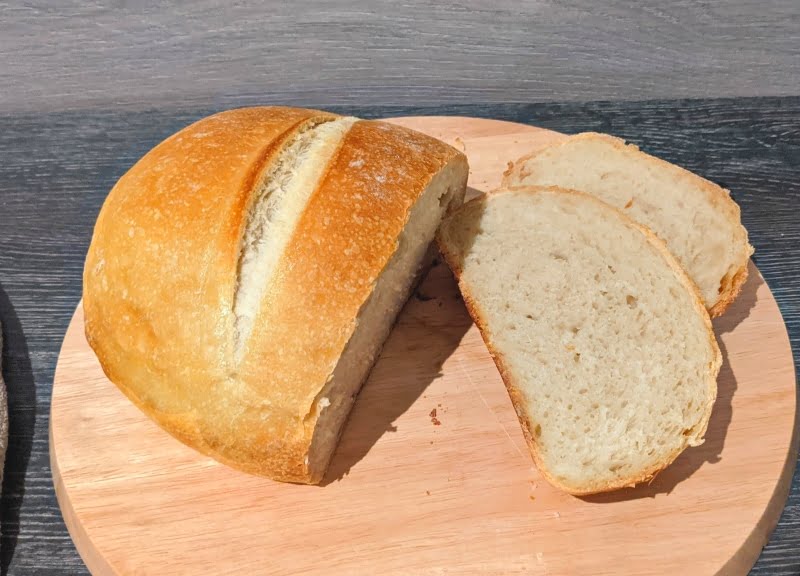
The finished result should look pretty spectacular and your house should smell amazing!

Tip your bread out of the pan – it should slip out pretty easily, and allow it to cool on a cooling rack.

This is the most difficult bit! You have to wait at least an hour for the bread to cool before slicing. If you slice too early the inside will have a claggy texture. It’s hard because it smells so good and you’ll really want to eat it but, trust me, just wait an hour or so then you can slice and enjoy!

Making homemade sourdough bread from scratch is a lengthy process that requires lots of patience, but as you’ve seen here, it’s not difficult to do. The thing I’ve found after working with sourdough for many years is that you need to either be very good at planning ahead or have all the time in the world.
It’s extremely satisfying though, to produce a loaf of bread that you’ve created entirely from scratch, especially when the end result looks so good, your house smells amazing and your family devours your sourdough bread!


Thank you so much! I’ve tried to make sourdough bread before and never had any success. I followed your procedure step by step and finally produced a winning loaf! So happy to have found a sourdough bread recipe that works!