How To Make Sourdough Starter From Scratch
Making bread at home has always seemed difficult. Working with yeast, whether it be dry or fresh, can give unpredictable results at home and often produces bread with a homemade, yeasty taste. There must be something professional bakers aren’t telling us – how do they make their bread taste so good?
As bread is relatively cheap and easily available to buy, many people wonder why you would bother to make your own bread at home.
Hello March 2020! With the Covid-19 pandemic stretching across the globe and people being urged to stay in their homes, not to mention the difficulty in sourcing certain ingredients and groceries from time to time, people are starting to take an interest in baking their own bread at home.
Hopefully this is something that might stick with people in years to come, well after the current health emergency has passed, because making your own sourdough bread is actually fun and easy to do.
You can even think of it as a fun and science-y activity to do with your kids, because to make your own sourdough bread you first need to make your own sourdough starter. It’s almost like creating your own pet to look after because your sourdough starter becomes a living thing that requires warmth and daily feeding – more fun for the kids to do!
Making Your Own Sourdough Starter From Scratch
Making your own sourdough starter from scratch requires just two ingredients which you probably already have – flour and water.
On day 1 when you are first beginning your sourdough starter, we’d recommend using wholemeal or whole wheat flour as this will kick start your starter off well. Then, for your daily feedings, switch to ordinary, plain, all-purpose flour.
So, how do you make sourdough starter from scratch? Don’t worry, it’s easy and fun and we’ll take you through it step by step.
It will take 7 days before your “mother dough” is ready to be used to bake sourdough bread but, you’ve got plenty of time right now, right? Don’t worry, it’ll be time well spent (and it only takes a couple of minutes a day).
In showing you how to do this, we decided to conduct a little experiment at the same time. We’re checking out to see whether there is any difference in keeping your starter/mother/culture in a glass jar (where light can get in) or in an old ice cream/plastic tub (where light will be limited).
We’ll show you the daily progress of the starter in both containers as we go and then we’ll test the resulting cultures by baking them into sourdough bread and seeing if there is any difference in the taste and texture of the resulting loaves.
Day 1 Of Making Sourdough Starter From Scratch
We begin with just two ingredients – 150g/5oz wholemeal flour and 250ml/1 cup warm water (slightly above room temperature).

Pour the warm water into the flour.

Whisk to combine. Try to get some bubbles appearing.

Pour the mixture into the jar you plan on keeping your mother dough culture in.

Put the lid on and keep it warm. If it’s a warm day it should be fine left alone but if it’s quite cold you can store your culture in a recently turned off but still warm oven or sit it somewhere cosy with a hot water bottle – it’s just like looking after a pet!

That’s it for day one of making your own sourdough starter – we told you it was easy! Check it in 12 hours or so – make sure it’s warm and comfortable. It should be starting to ferment.
Day 2 Of Making Sourdough Starter From Scratch
Don’t be alarmed if you go to feed your mother dough culture on day 2 and notice a dark liquid sitting on top or even in between layers of your starter dough.

This dark liquid is called “hooch” and it’s a sign that the fermenting process has begun. It can also get pretty smelly!
If you discover hooch in your culture try to remove it along with any discolored starter/culture.
Your next step on day two is to remove half of the mixture. This is where our experiment will begin. Instead of discarding half of the mixture as you would normally do, we put half of the mixture into an ice cream/plastic container so we can assess which type of container is better for making your own sourdough mother culture.

Then it’s time to feed your new mother dough/starter culture. Remember we’re now making two starters to compare but, if you’re following along at home you’ll likely just discard half the mixture and feed your remaining culture.
Feed each culture with ½ cup all purpose/white/plain flour and ¼ cup warm water.

Mix with a fork until combined.

So now, for our “experiment” we have two mother cultures or sourdough starters to care for and feed.

Put the lids on and keep in a warm place.
Day 3 Of Making Sourdough Starter From Scratch
It’s starting to smell now!We’ve got some lovely bubbles appearing in both of our cultures.


Discard half of each mixture and add ½ cup all purpose/white/plain flour and ¼ cup warm water.


Mix it up with a fork until it’s smooth and creamy.


Lids on and keep them warm.
Day 4 Of Making Sourdough Starter From Scratch
Things are getting smellier! But there are lots of lovely bubbles so it looks as though our cultures are heading in the right direction.


The starter in the plastic (ice cream) container seems to have more hooch than the glass container – what does this mean? Not sure! It will be interesting to see which starter performs best when it comes to baking.
Discard any hooch/liquid as well as approximately half of each mixture.
You know the drill now – add ½ cup all purpose/white/plain flour and ¼ cup warm water and mix with a fork to combine.


As always, put the lid on and keep warm.
Day 5 Of Making Sourdough Starter From Scratch
Day 5 and we’re doing it all again! Both of our starter’s are giving off a pungent smell and both have bubbles. Definitely more hooch/liquid present in the starter being kept in the plastic container.


Again we will add ½ cup all purpose/white/plain flour and ¼ cup warm water and mix with a fork to combine.


It’s a little chilly in our house today so we’ve resorted to giving the starters some warmth from a hot water bottle – not too hot, just a warm hot water bottle.

Day 6 Of Making Sourdough Starter From Scratch
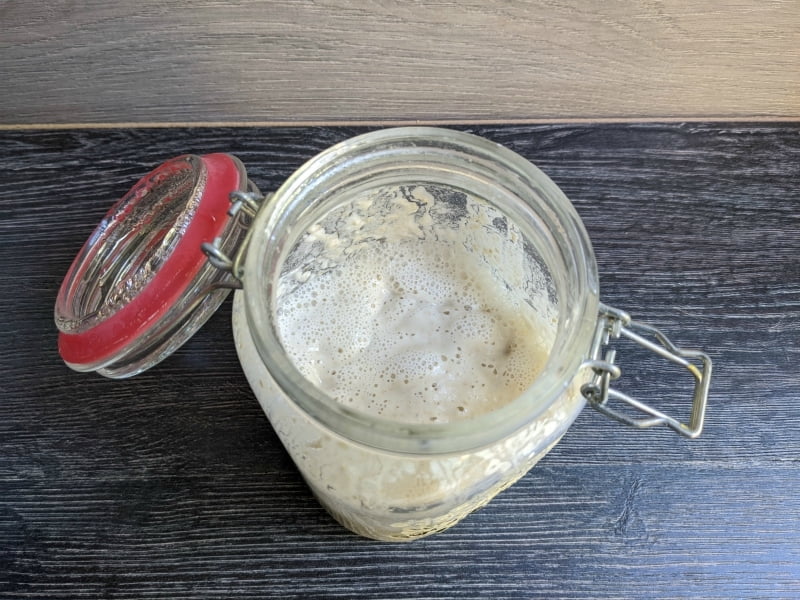
Exciting signs today! The starter in the glass jar appears to have doubled in size, it’s bubbly and frothy and is giving off a pleasant, yeasty smell.


This mother dough is probably ready to bake bread with, however, the starter in the plastic container still has a pungent odor and does not seem to have achieved this nice bubbly, frothy state.

So, in the interests of keeping our “experiment” going, we will feed both of our starters again today and maybe test their readiness tomorrow.
You know what to do – add ½ cup all purpose/white/plain flour and ¼ cup warm water and mix with a fork to combine.


To help us to check the growth of the starter, this time we’ve added a piece of tape as a marker to show the level of the mother dough currently. Hopefully when we check again tomorrow we’ll see signs of growth and activity in both starters.


Keep your starter warm and check in again tomorrow.
Day 7 Of Making Sourdough Starter From Scratch
Good news today – the starter in the glass jar is bubbly, smells yeasty and has doubled in size!


So now we can try a float test to see if this starter dough is ready to use. Basically we put a teaspoon of starter into a glass of water.
If the starter floats it means it’s ready to bake with, if it sinks, don’t panic, just feed as normal and keep the process going until you get that lovely active sourdough starter. It may take a few more days or even a couple more weeks depending on climate and conditions. Be patient, keep feeding and you will get there!
To test if your starter is ready to use, add a teaspoon of the dough to a glass of water.

Looks as though we’ve made it! Our float test worked – the starter dough is floating nicely so this sourdough bread starter is now ready to bake some sourdough bread!

Unfortunately, the sourdough starter we have been trying to get started in the plastic container is still producing a lot of hooch and has a stinky, pungent smell so it’s still not ready to use. It’s got some nice bubbles so there’s definitely something going on there but it’s going to take some more time.

Not to worry, we’ll give it a feed and pop it back in a warm place and keep checking and feeding daily.


So, in terms of our little “experiment” it would appear that using a glass jar to keep and feed your mother dough works better (or at least faster) than using a plastic container. Without getting too science-y about it, this could be because more light is useful, or maybe the glass is a better insulator and keeps the temperature of the starter dough warmer or more consistent.
I’m sure there is someone out there who has conducted proper research into this who could explain it more. I was just curious as, while most examples I have seen used glass jars to grow their mother dough cultures, in my research I also found a few using old yoghurt/ice cream plastic containers.
I wondered what the difference would be. From my crude results my tip is – use a glass jar to make your sourdough starter from scratch.
This is where we will leave you. Hopefully you have now managed to create your own active sourdough starter from scratch.
If you have, head here for how to use your sourdough starter to bake sourdough bread. If your starter has not achieved that lovely, bubbly, yeasty state yet (like our one in the plastic container) just keep going. Daily feedings, keep it warm, and one day soon you’ll have your own sourdough starter ready to use!